


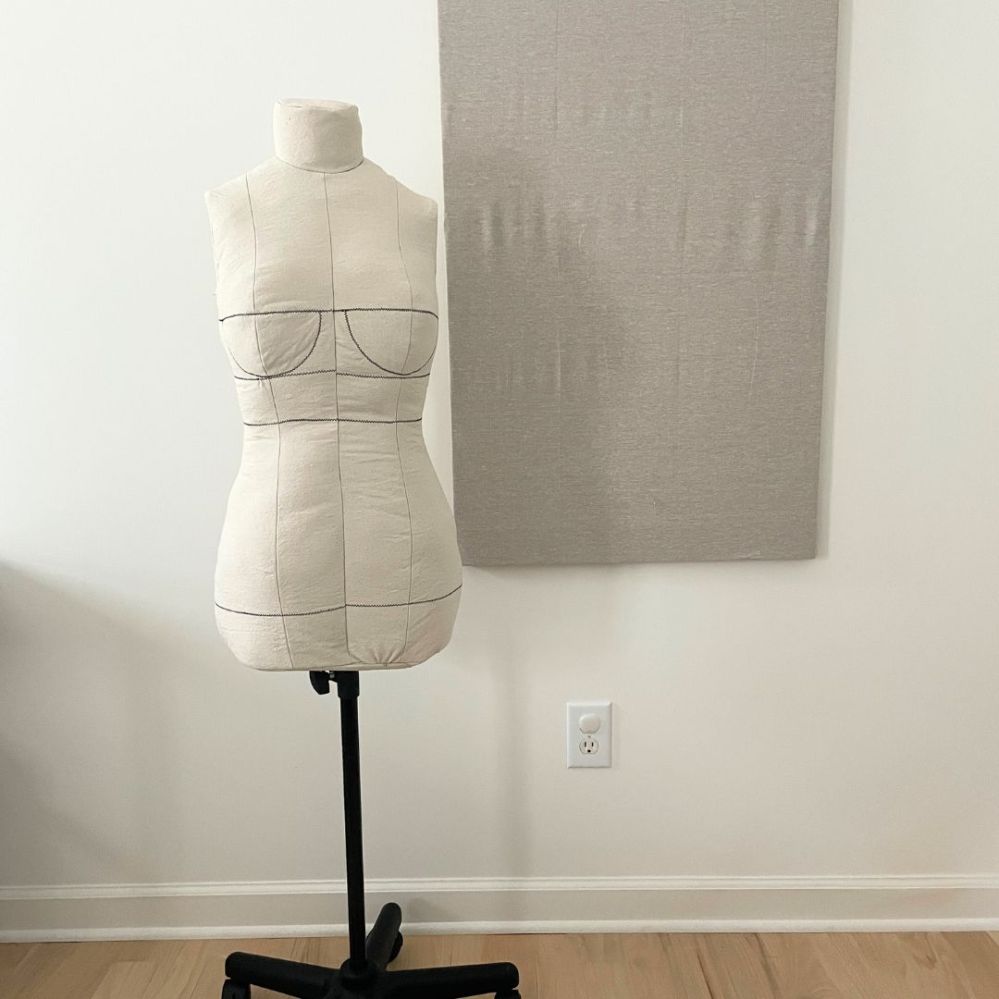
I’ve always wanted a twin! Thanks to Bootstrap Fashion I finally have one 🙂
I won’t go into much detail about how to construct the dress form because I think Bootstrap Fashion did a fantastic job with the written instructions and providing helpful tips throughout the ENTIRE process from ordering to constructing the piece. So I’ll just give you details of my experience and a video of me constructing the form 🙂
Video Making A Custom Dress Form
Pricing
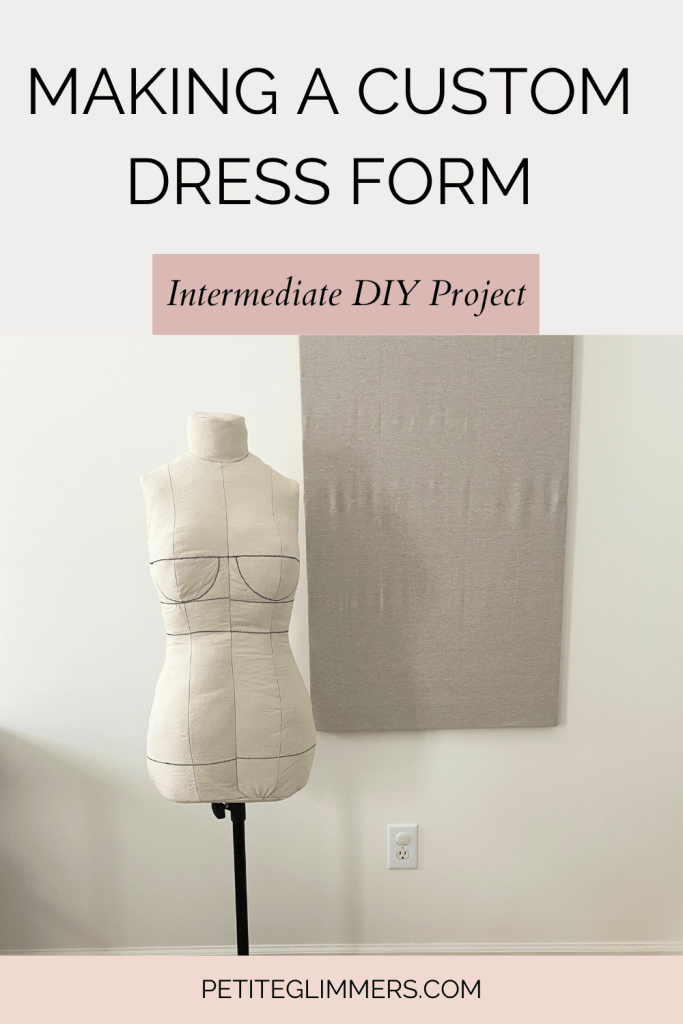
First of all, let’s talk about pricing. Ordering a custom dress form can be close to $1,000 and this entire project took me $65 to make the form, $125 if you include the base.
- $28 Pattern
- $15 Fabric
- $8 Filling
- $4 Zippers
- $4 Sponge
- $3 PVC Pipe
- $3 Thread
- $60 – Dress form base (you can save here by finding a cheaper base OR creating your own by using something like an old coat rack)
Ordering Process
The ordering process was extremely simple and it took me about 10 minutes to fill out the form with my own measurements. There is an additional “Fit Adjustments” tab that is optional and I decided to fill out this form as well – if I’m making a custom dress form I might as well take advantage of all the customization options!
I received a confirmation email within 1 minute of placing my order and an email with my personalized sewing pattern, sewing instructions, and other details within 10 minutes.
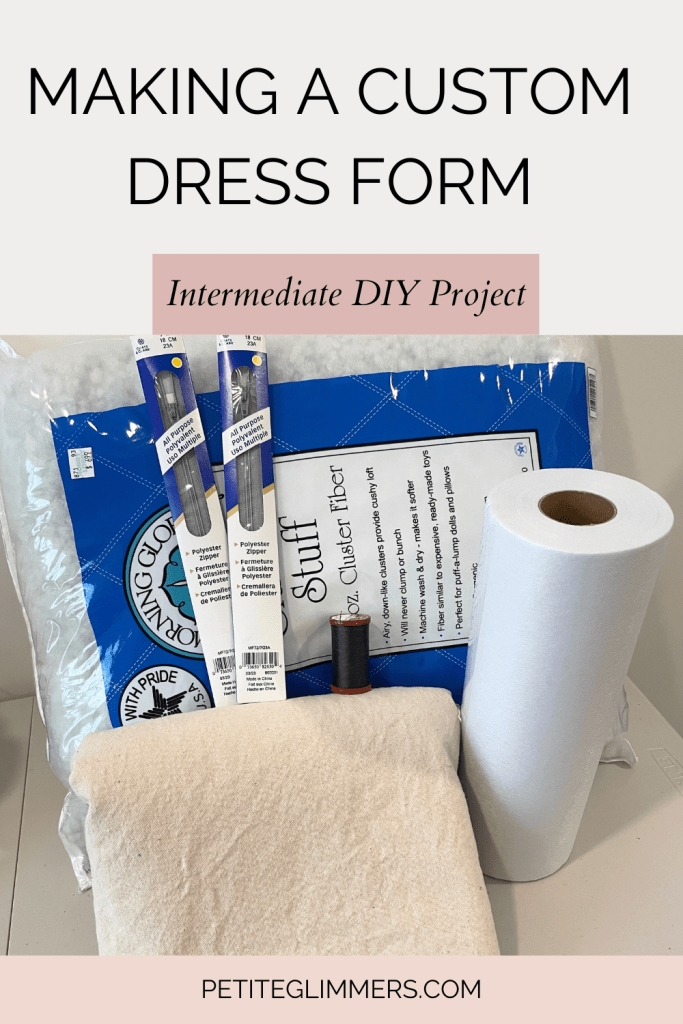
Putting The Letter Size PDF Pattern Together
This was my first time working off of a PDF letter size pattern where I had to tape the pattern together. My order came with 24 pieces – 2 columns of 12 pages. I also chose to have seam allowance as part of the pattern while ordering.
Preparing The Fabric
Always always pre-wash your fabric. I decided to work with a woven canvas fabric because I wanted the form to be sturdy and non-stretch. The instructions mention adding interfacing to the fabric BEFORE you cut the pattern, but I decided to cut the pattern first and add the interfacing AFTER. This was just a personal preference of mine because I didn’t see the harm in going this route.
Adding the interfacing after cutting the pattern also made it easier for me to iron the fabric in smaller pieces rather than one long roll.
Constructing The Custom Dress Form
Things were pretty simple when I started sewing the first 6 or so pieces together. Then things got a little frustrating for me once the body began to take shape. It was only frustrating for me, though, because I am not a patient person – hence why I’m challenging myself to sew this year (yay personal growth!). I realllly had to slow down along the curves of the armholes, neckline, and base. Literally anything with a curve I had to take my time…and lucky me, this entire dress form has curves.
Overall, constructing the dress form was fairly simple once I got over my hurdle of impatience. The instructions provided were easy to follow and they provided clear photos of every step along the way.
If my impatient self can get through constructing the form, I believe you can too!
Filling The Custom Dress Form
I definitely overstuffed the form when I added filling. I recommend measuring the bust, underbust, waist, and hips as you stuff so you can adjust as you go.
To be fair, the instructions do mention this. But I was too excited to “slow down” and measure (there’s that impatience showing again). In reality, I spent more time than I needed to because I had to unstuff the form and fill it again while measuring along the way.
Creating The Form Base
I decided to order a dress form base from Amazon. It was extremely simple to put together and I love how easy it is to adjust the height. The only downside I want to mention are the wheels. They aren’t super smooth, but they do the job. I figured this is something I can upgrade in the future if I happen to wheel around the dress form a lot.
Conclusion
Overall, I recommend the Missy DIY Custom Dress Form from Bootstrap Fashion! Not only was this ~12.5% of the cost of a custom dress form, it was something that I’m proud to say I made myself. Here’s to a future of draping for my sewing projects!


Leave a comment