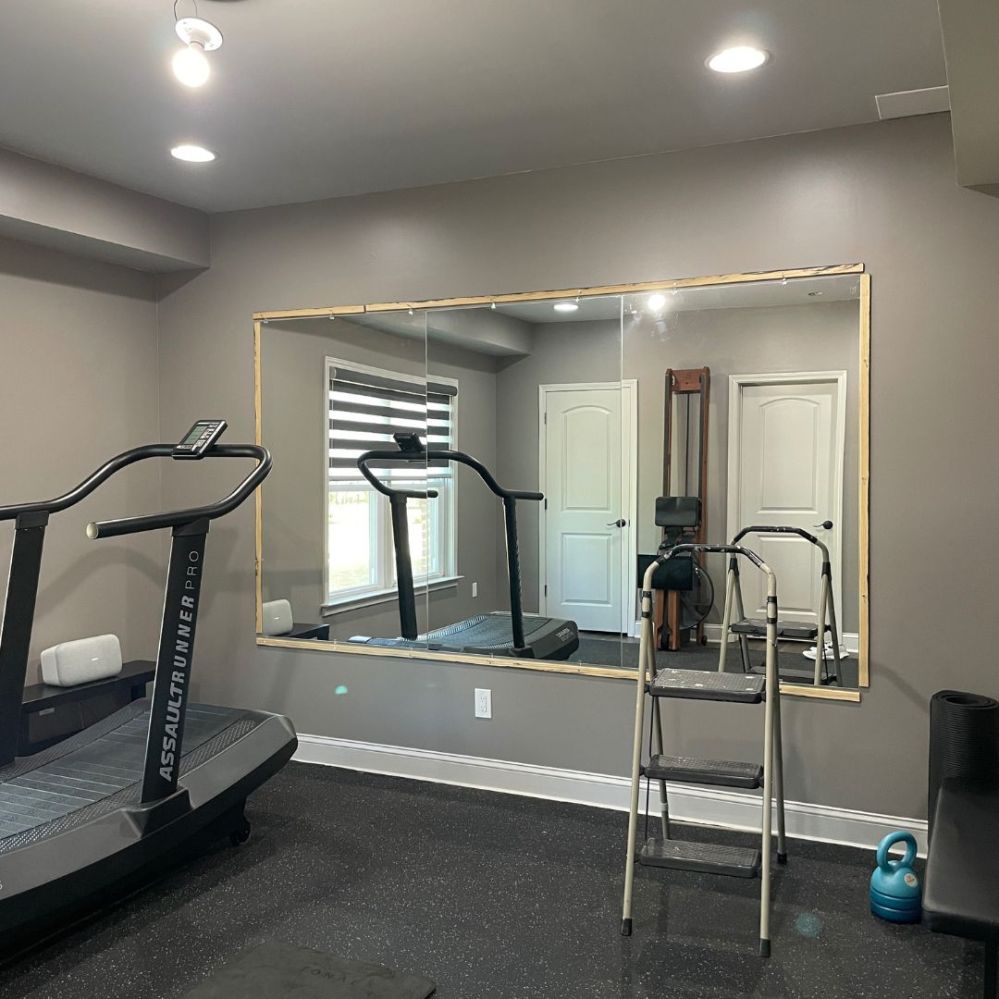
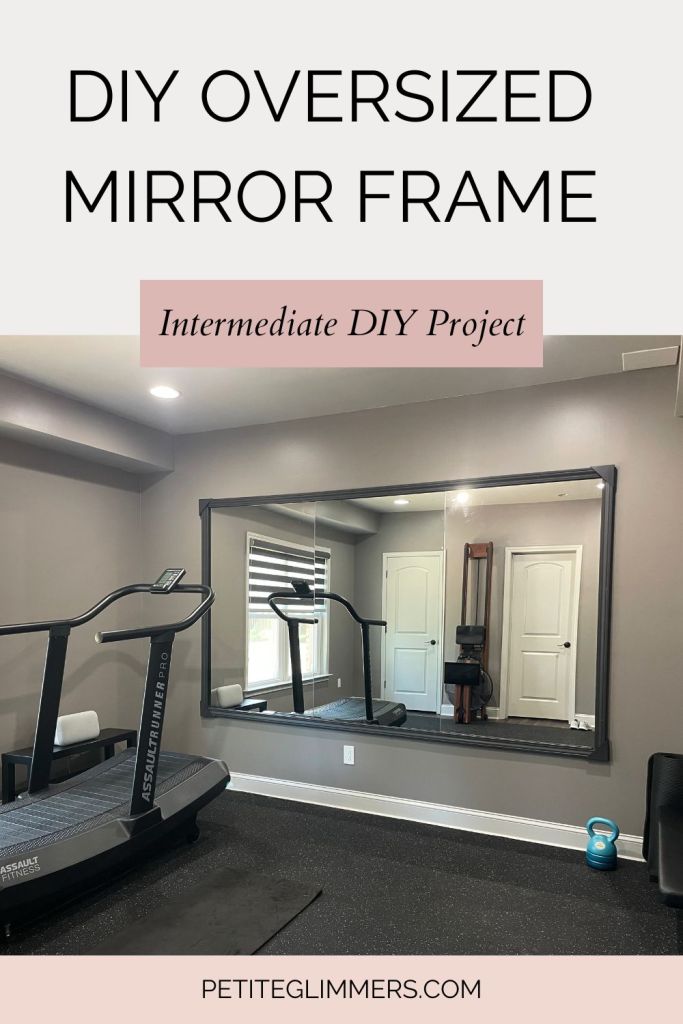
Time for a gym upgrade! And by upgrade, I mean the tiniest change that made a huge difference.
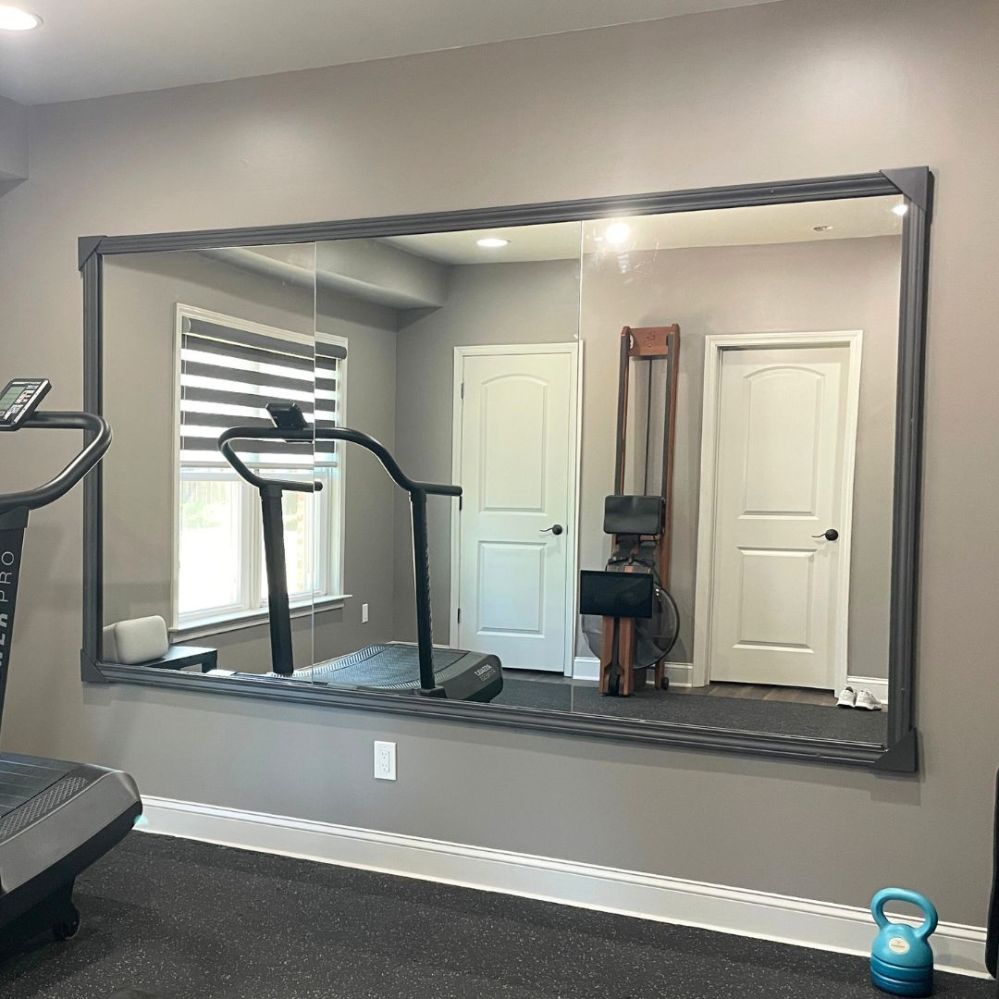
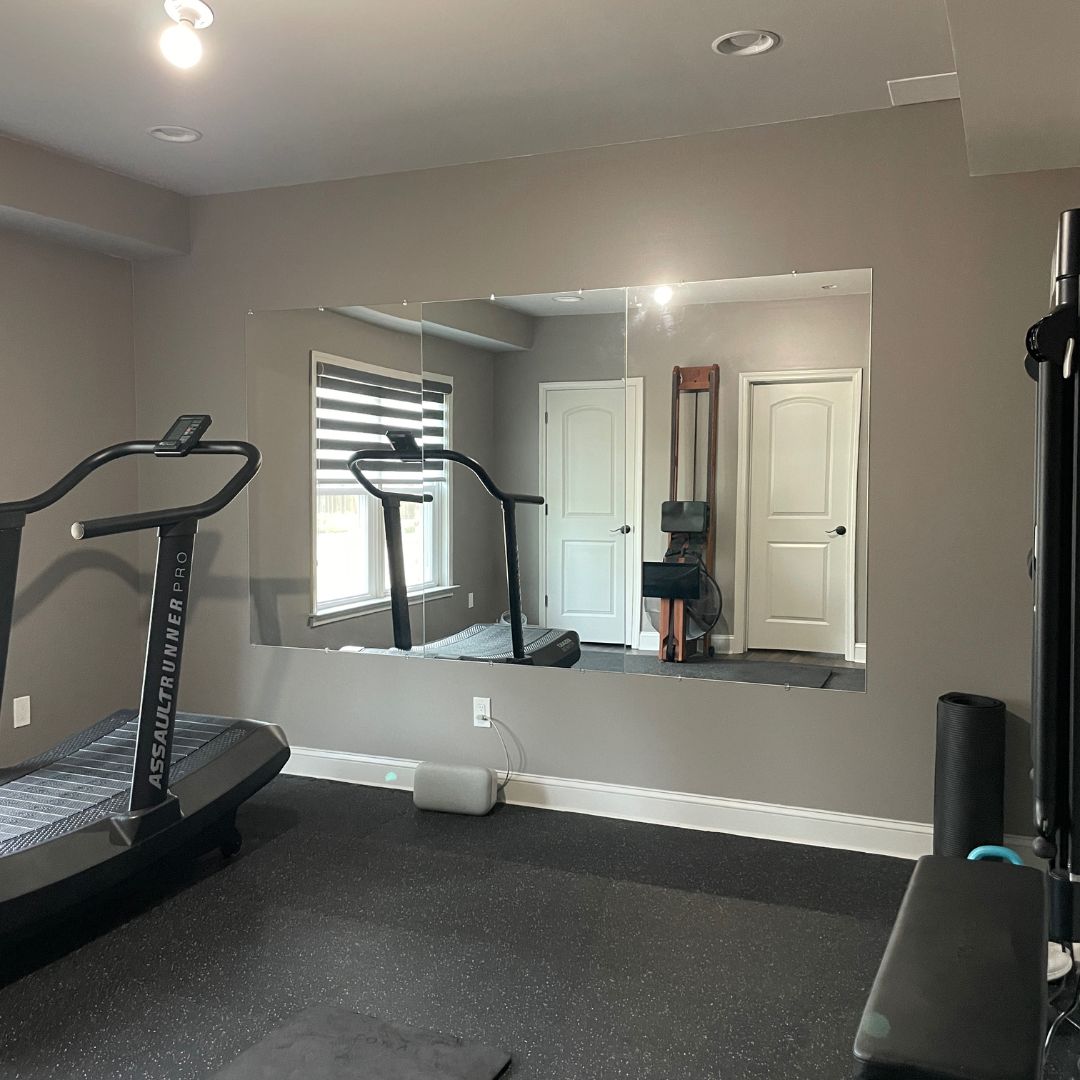
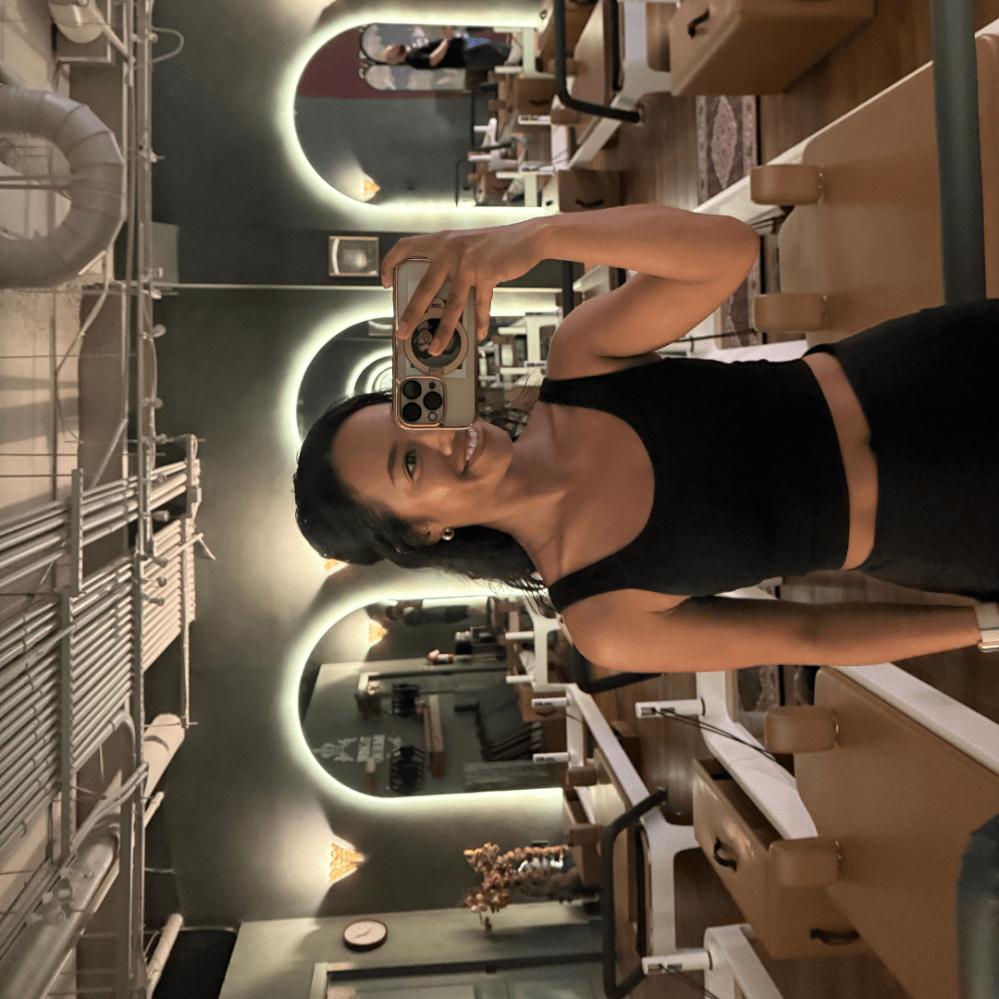
Last year my husband and I installed three 36” x 60” mirrors in our home gym and I thought it was time to elevate the look and complete the space by adding a frame. Depending on the size and material, quotes I received for this were well over $500 (yikes).
Not only was the cost a problem, but so was the installation. I didn’t come across a custom frame option that allowed us to keep the original brackets that held the mirror up. See . . . we didn’t glue our mirror to the wall when we installed it. We simply used the little brackets that came with the mirror and it overhangs by about .25 inches. Sigh.
But no biggie. This was a challenge I was willing to take on by myself! I created this 60” x 108” mirror frame for about $20.
Here is a before and after comparison.

Tools & Supplies
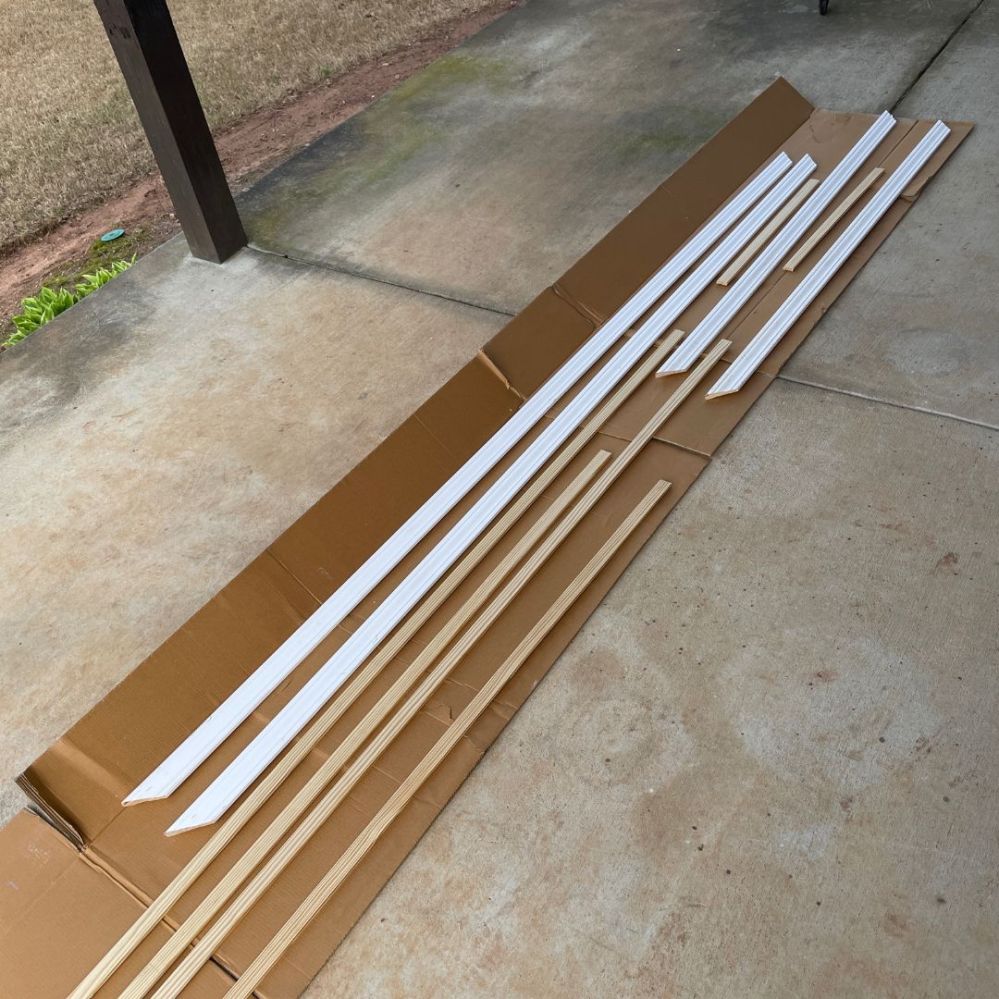
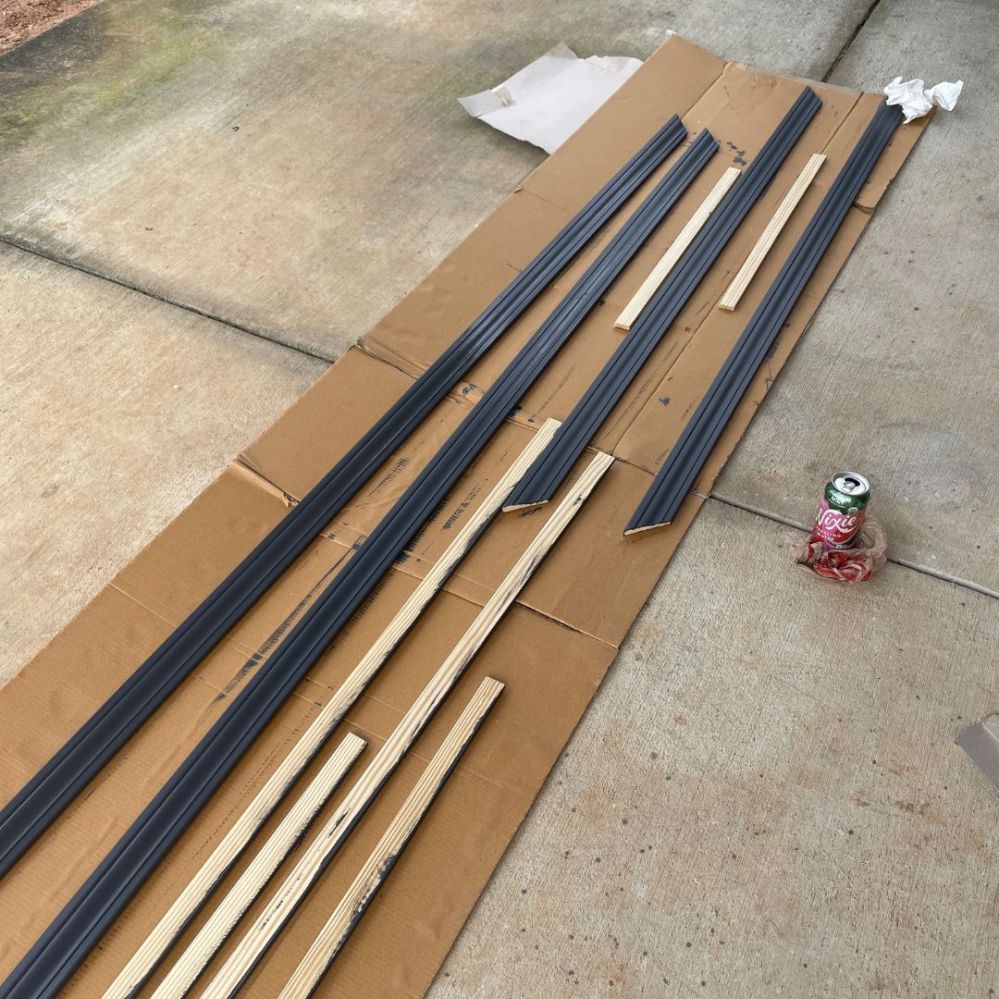
- Trim (I used leftover trim from previous reno projects)
- Four 2 inch x .25 inch x 8 feet wood ($15 – used as brace for frame)
- Screws
- Drill
- Level
- Paint (sample size ~$5)
- Measuring tape
- Pencil
Instructions
Here is a quick video of how I created the frame:
Here is a written guide on how I created the frame:
- Measure the width and length and cut your trim and wood for brace at a 45 degree angle
- Paint the trim and the sides of the extra wood that may be seen (I only painted the .25 inch sides
- Attach the unfinished wood to the studs just outside the mirror using screws (I created pilot holes in the wood before doing this, but you might not need to)
- Avoiding the screws you just placed into the wall/studs, attach the trim on top of the unfinished wood using screws
- Fill/paint the screws on top of the trim and the corners to match the rest of the border
- Done!


Tips:
- I cut the 45 degree angle free handed. This wasn’t the best idea, but I didn’t have the necessary tools to line everything up correctly. To cover the mismatched corners, I simply painted cardboard in the shape of a triangle, and covered the frame corners. This is a temporary fix! I will create a permanent fix for this later – I was just being very impatient with this project 🙂 What’s new?
- Create pilot holes in line with the studs when you are attaching the unfinished wood around the mirrors.


Leave a comment